Embedding the Twitter timeline as a widget on your WordPress website is simple and can be very beneficial. Here’s an example of what it will look like.

It’s a very basic layout and exactly what’s needed. It provides a link to our twitter page, a follow button, our feed, and even a tweet button. This is the design that comes right from the Twitter Developer’s page… so let’s go ahead and get started. Note: A plugin is not required for this.
Log in to your Twitter page and click on settings.

On the left side, click on widgets.
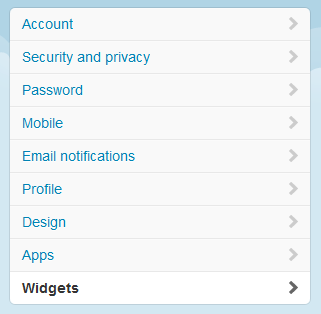
Next, click create new.

Now we can edit the look of the timeline. You can play around with the settings and set your preferences. I recommend reading the timeline customization documentation for more advanced details. For example, Twitter explains the timeline will automatically shrink to the width of its parent element.
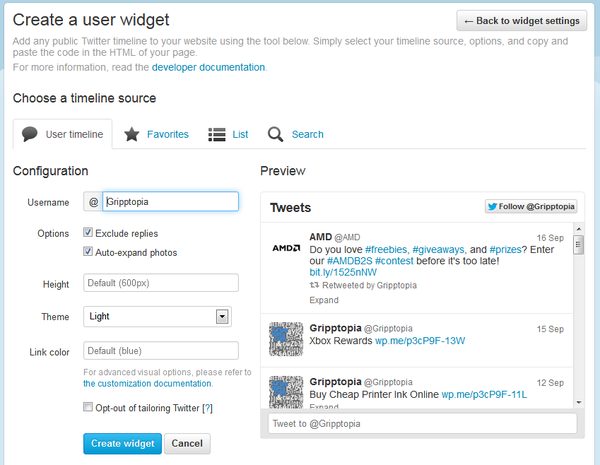
Once you set up the widget to your liking, click on create widget and copy the code provided.

Log in to your WordPress admin page. Go to Appearance > Widgets. Drag a text widget to the widget area of your choice. Click the arrow to edit the text box and paste in the code. Hit save and check your website to make sure it’s showing up.
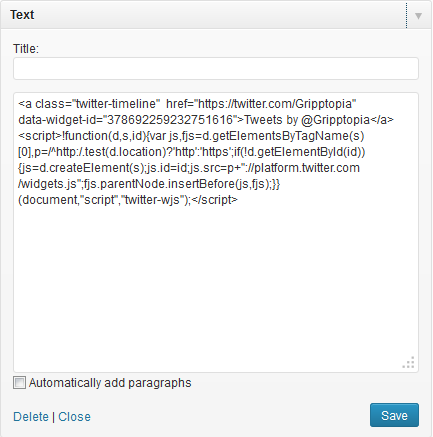
If you want to change any settings, you can go back and edit the timeline in your Twitter widget creation page. There is no need to keep pasting in new code. The timeline will automatically change after editing.

Some of the other apps Twitter offers can be found on the Twitter Developers page.

You can also check out various WordPress plugins for adding in twitter widgets. Some of the top twitter related plugins are Kebo Twitter Feed, Really Simple Twitter Feed Widget, and Twiget Twitter Widget.

